Introduction to CPT Galaxy
Overview
QuestionsObjectives
Time estimation:
Last updated: Feb. 7 2024
Agenda
In this tutorial, the following topics will be reviewed:
- First-time users
- Registering an account in Galaxy and Apollo
- Tools
- Uploading Data
- Choosing and Executing a Tool
- Histories
- The Current History
- History Information
- Datasets
- Managing Datasets Individually
- Switching Histories
- Workflows
- Importing a Workflow
- Running a Workflow
Registering a Galaxy account
For the past ten years, the Center for Phage Technology (CPT) at Texas A&M University has developed and hosted its phage genomics tools on its own public-facing Galaxy instance. Starting in 2024, these tools will be hosted on the main European Galaxy instance at phage.usegalaxy.eu. If you are a first-time user of the CPT Galaxy genomics platform, we encourage you to begin by registering a free user account at phage.usegalaxy.eu. We are continuing to migrate our tools and workflows to this platform through 2024. If you are already a user of the CPT’s original Galaxy instance at [https://cpt.tamu.edu/galaxy-pub], this system will continue operating until its planned shutdown date of August 2024. After this time, we will only be supporting operations at phage.usegalaxy.eu.
Galaxy tools from the Center for Phage Technology
Galaxy is a platform for doing reproducible bioinformatics research. It provides a user-friendly interface for a vast number of complex command line tools, and it encourages consistent science by using identical software and interfaces across all Galaxy instances. Galaxy aims to make computational biology accessible to research scientists that may not have computer programming or system administration experience. The Center for Phage Technology (CPT) utilizes Galaxy for most computer-based analysis. Computationally intensive jobs can be launched and left; enabling scientists returns to lab work. Galaxy keeps track of the job progress and automatically saves the work done up until that point.
Note that…
The screenshots displayed here may not precisely reflect what you see on your screen. As our systems are regularly updated, it is likely that the current version year/number or the exact window display is different. Look for the most recent workflows/tools.
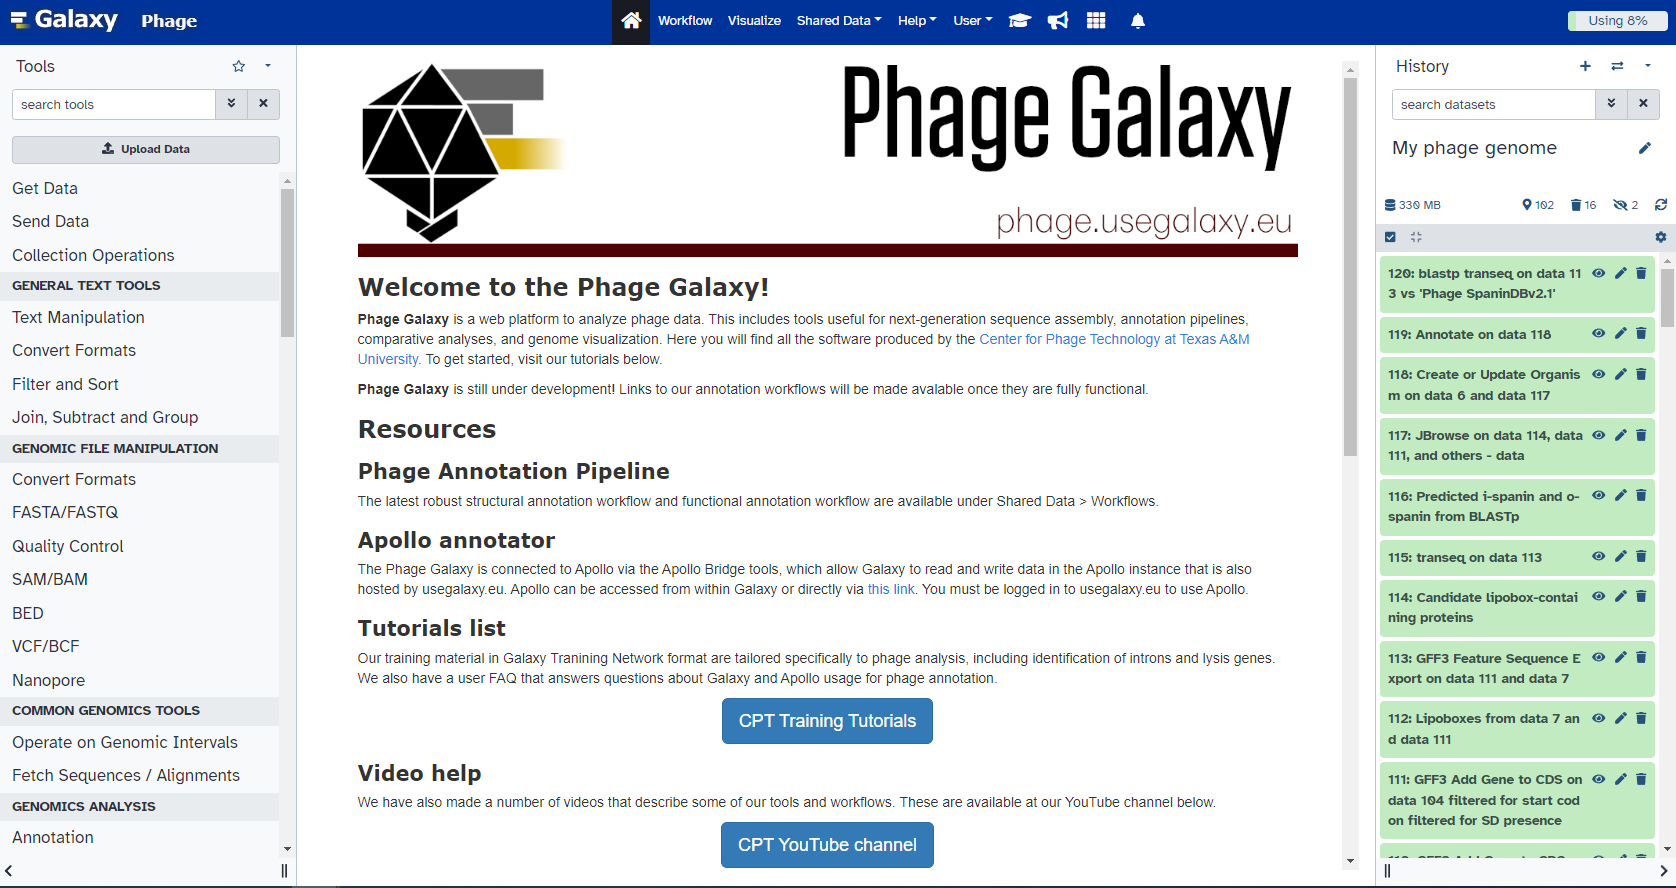
The Galaxy user interface consists of three panels; on the left is a column containing all available tools. In the center is where analysis will occur and results displayed. On the right is where the current history resides.
Note that…
If the user is lost within the browser interface, clicking the Home icon in the blue bar at the top will return the user to the Galaxy home page. Refreshing the page will also return to the home page without losing any work done up until that point. Galaxy automatically saves all progress.
Tools
What is a Galaxy Tool?
A Galaxy tool is…
… a bioinformatic program (usually a script) that generates/transforms data. Within Galaxy, tools are simple interfaces to the complex software behind them. Some examples of a tool would be Gene Caller, which reads the genome and produces a list of possible gene locations, or BLAST, which searches protein sequences in the genome against a database.
Obtaining Data
Uploading data from external sources
Galaxy tools process input files and produce output files. To upload data from the user’s local device, click on the upload symbol in the top right-hand corner of the Tools column on the left side of the screen.
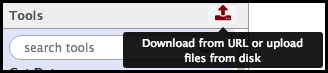
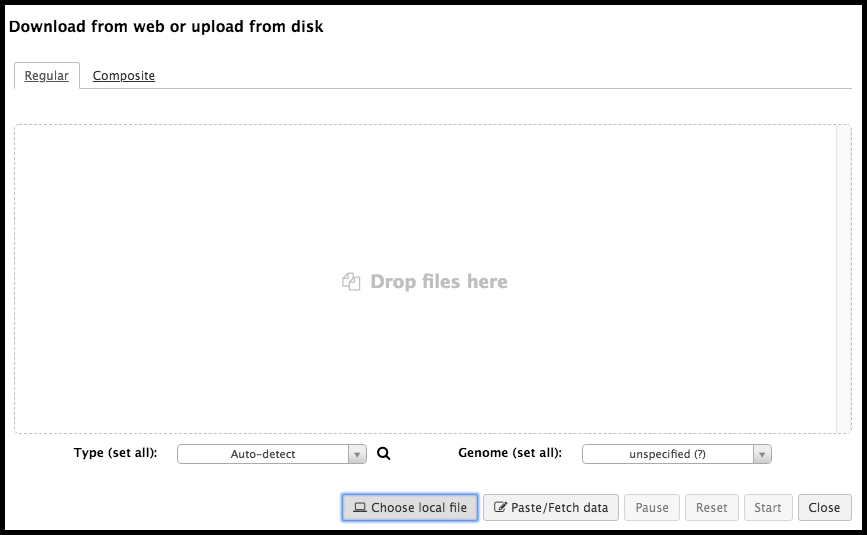
This will bring up an upload menu that will allow the import of data into Galaxy. Files can be dragged and dropped into this box; alternatively, clicking on Choose local file in the bottom menu enables the browsing of files on the local device for upload.
Advanced Users…
- Choose FTP file allows one to select a file that has been previously uploaded via FTP. This is required for files >2GB.
- Paste/Fetch data allows one to paste in a bit of text or a URL. Galaxy will import that into the history panel on the right.
- This tutorial offers many different examples of various means of uploading data into Galaxy.
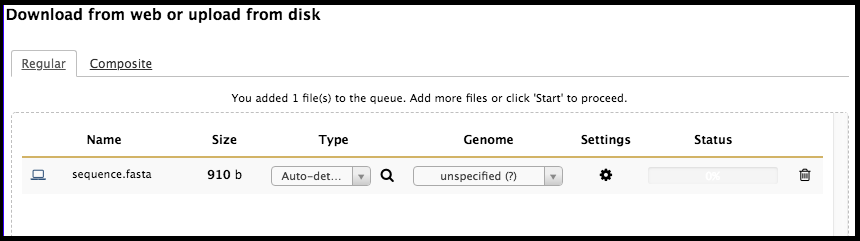
Once the file has been detected by Galaxy, it will appear in the upload window.
File Format Issues?
If Galaxy does not detect the file type properly, the user can set the file type. As this is a rare occurrence, be sure to double check the file is formatted properly before overriding Galaxy.
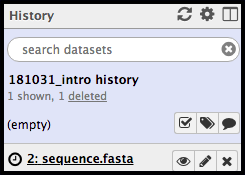
When all of the files desired to be uploaded have been selected, click Start in the bottom right of the upload menu. The dataset will indicate to you that it is uploaded in the upload window by yielding a 100% status; at this time, the window can be closed. In the history column, the freshly uploaded dataset will be grey with a clock symbol…
note that the file(s) must be completely finished uploading before you can navigate away from this page. Failure to wait until all files are uploaded will result in a loss of these files.
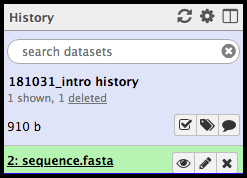
… followed by green when it is ready.
Getting data from other places in Galaxy
Sometimes, the data you want to use has already been uploaded to Galaxy by another user or by one of the administrators. In this case, you can move data directly into your active histroy from within Galaxy, rather than downloading it to your own computer and then re-uploading it to Galaxy.
Data libraries are stored files that are accessible to users of a Galaxy instance. These are usually set up as “one-way” data storage: users can download data to their computer or import data into a Galaxy history, but cannot upload data to a data library without administrator permission. These are useful for storing and sharing data that many users may want to access, such as raw sequencing data or assembled genomes.
Data libraries are accessible under the Shared Data menu on the Galaxy top menu bar. Data libraries are arranged as directories (folders) that contain subdirectories (subfolders) and/or files. Entire folders or individual files may be imported by checking the box(es) to the left of the desired file(s) and clicking on the To History or Download buttons at the top of the screen.
Published histories are regular Galaxy histories that a user has decided to share with other Galaxy users. Published histories are accessible under the Shared Data menu on the Galaxy top menu bar, and are presented as simply a flat list of all published histores and the user that created them. Clicking on a history will allow the user to view it. To actually use the datasets in the published history, click on Import history at the top right of the screen. Importing the history creates a copy of the history under your own account; any changes you make will not be visible to other users (unless you decide to publish them), and you will not be able to see any changes the original publisher makes to the history (unless you re-import it).
Choosing and Executing a Tool
Now that there is data in Galaxy, it is ready to be processed by one of the many available tools! At the top of the tool panel is a search bar. Alternatively, clicking one of the bold, underlined selections will reveal multiple tools from which the user can choose. When selecting the tool, be sure to read the What it does text at the bottom of the tool interface page that appears; it will give the user important information regarding running the tool and its output format.
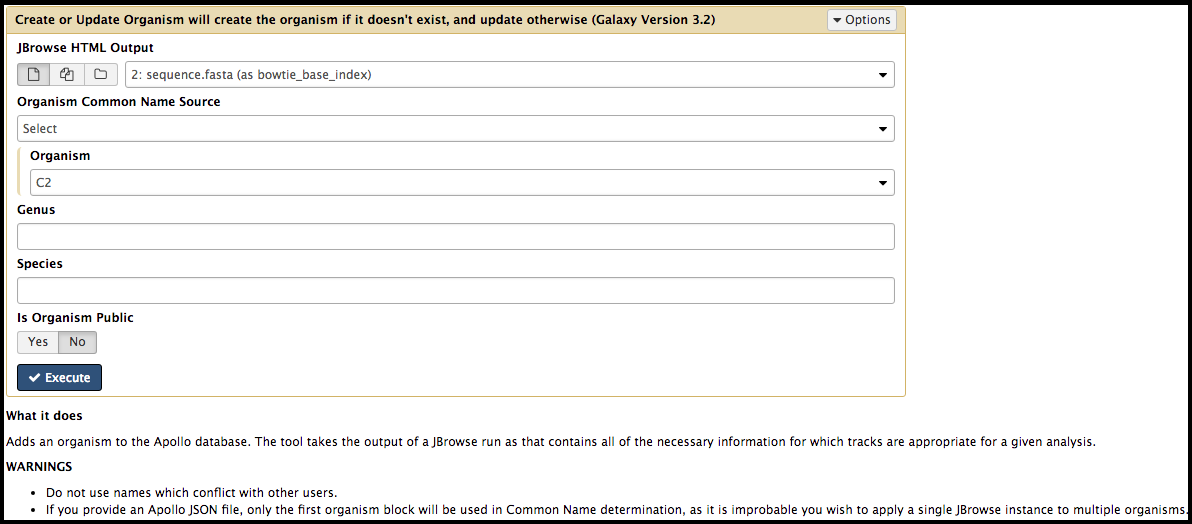
Review the options in the tool interface. Keep in mind that many options are set to default values. Uploaded files or other datasets in the current history can be used as inputs. When configuration of the tool is complete, click the execute, and it will appear as a set of output files in the history on the right.
Histories
When data is uploaded from your computer or analysis is done on existing data using Galaxy, each output from those steps generates a dataset. These datasets (and the output datasets from later analysis on them) are stored by Galaxy in Histories.
The Current History
All users have one ‘current’ history, which can be thought of as a workspace or a current working directory, in bioinformatics terms. Your current history is displayed on the right hand side of the main ‘Analyze Data’ Galaxy page in what is called the history panel.
The history panel displays output datasets in the order in which they were created with the oldest/first dataset shown on the bottom. As new analyses are done and new output datasets are generated, the newest datasets are added to the top of the the history panel. In this way, the history panel displays the history of your analysis over time.
Users that have registered an account and logged in can have multiple histories. The history panel allows switching between them and creating new ones. This can be useful to organize different analyses.
History controls
Above the current history panel are three buttons: Create New History, Switch to History, and History Options.
- The Create New History button will create a new history to begin working in. History use will be detailed later in this tutorial.
- The Switch to History button will bring up a window for switching between multiple histories.
- The History Options button opens the history options menu which allows you to perform history-related tasks.
History Information
Histories also store information apart from the datasets they contain. They can be named/re-named, tagged, and annotated. It’s good scientific practice to maintain organized records; this translates to Galaxy histories and datasets. Imagine yourself in three years looking at this history, or sharing it with another user: is it clear what the history contains?
Renaming and tagging a history
All histories begin with the name ‘Unnamed history’. Users can re-name histories to provide relevant details on the work they contain, such as the name of the organism and the date of the work:
- Click the pen icon next to the existing name. A text input field will appear with the current name.
- Enter a new name or edit the existing one the way you’d like.
- A description of the history can be entered in the Annotation field below the name.
- Tags (short pieces of text used to describe the thing they’re attached to) can be added by clicking the Add Tags button below the Annotations field. Tags are searchable within Galaxy.
- Press ‘Enter’ in the nale field or click the Save button to save. The input field will disappear and the new name will display.
History size
As datasets are added to a history, Galaxy will store them in files on its file system. The total size of these files for all the datasets in a history is displayed underneath the history name. For example, if a history has 200 megabytes of dataset data on Galaxy’s filesystem, ‘200 MB’ will be displayed underneath the name.
Switching Histories
There are three icons in the top right-hand corner of the History panel. The double-arrow icon allows you to view and switch between different histories. Clicking on this reveals the different histories. In the History Options menu, you can select Show Histories Side-by-Side. In this view it is possible to copy datasets between histories by dragging datasets between them. If a history you want to see here is not shown, scroll all the way to the right and click Select Histories to add new histories to this view.
Further Reading
To learn more about what a user can do with histories and datasets in Galaxy, please reference this tutorial.
Datasets
Each numbered entry within a history is called a dataset. Tool/workflow outputs and data uploads appear as datasets in the current history.
There are several different ‘states’ a dataset can be in:
- When you first upload a file or run a tool, the dataset will be in the queued state. This indicates that the job that will create this dataset has not yet started and is in line to begin.
- When the job starts the dataset will be in the running state. The job that created these datasets is now running on Galaxy’s cluster.
- When the job has completed successfully, the datasets will be in the ok state.
- If there’s been an error while running the tool, the datasets will be in the error state.
- If a previously running or queued job has been paused by Galaxy, the dataset will be in the paused state. You can re-start/resume paused jobs using the options menu above the history panel and selecting ‘Resume Paused Jobs’.
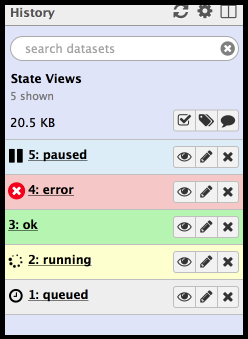
Datasets can be one of four colors:
- Grey = the tool has been submitted but has not yet begun processing.
- Yellow = the tool is currently running
- Light Blue = the tool is paused
- Green = a successful execution of the tool
- Red = a failed execution of the tool
Each dataset entry includes useful metadata. Clicking on the name of a collapsed dataset will open the expanded view.
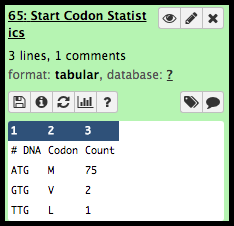
Near the top, the format is listed as tabular. At the bottom of the expanded datasets is a preview of this table. Galaxy keeps track of file formats to ensure only correctly-formatted data is used for tools.
- views the dataset in the main window
- modifies the metadata
- X deletes a dataset (these can be recovered! See below.)
downloads the dataset to the local device; note that Galaxy will always have a digital copy.
- views details about the tool that was run, and how the job was configured.
is commonly used, as it re-runs the tool with the same parameters configured. Additionally, these parameters may be tweaked before re-running.
presents the dataset in different ways. Charts allow the user to build graphs from a tabular dataset, and a Multiple Sequence Alignment (MSA) visualization plugin in Galaxy allows for interactive exploration of MSAs. Note that not all datasets are compatible with this function.
allows for the annotation of datasets with tags. Extremely useful as they are searchable.
allows the user to comment on a dataset; this could be a reminder of why it was executed, or perhaps to annotate interesting results found in the output. Also a searchable field.
Failed Datasets
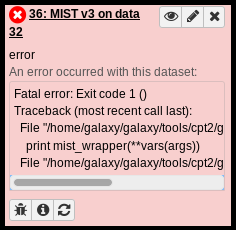
Sometimes tools fail and the output dataset turns red. A red dataset means that the tool has terminated with an error of some kind. If it was part of a Workflow (see below) and downstream steps were waiting on the failed dataset, the workflow will not continue, and you may see one or more of the queued datasets remain in the paused (light blue) state.
Tools may return errors for a number of reasons, some of which the user can correct. Clicking on the name of the failed dataset will open details about the job.
A common reason that tools fail is that the user specified an incorrect input dataset or tool parameters. Click on the circular arrow “re-run” button to bring up the tool’s original run paramters. Double-check that you selected the correct dataset(s) as input, and that you set any other parameters approriately, and try executing the tool again.
If your inputs are all correct and the tool still fails, there may be a bug in the tool. Selecting the bug icon in the bottom left-hand corner will bring up a page in the main Galaxy interface that provides the error text and a form for reporting the error as a bug. There, a message can be typed and a report submitted to Galaxy staff. It is always recommended to submit bug reports when jobs fail because it improves the system for all users.
Managing Datasets Individually
Hiding and unhiding datasets
Some procedures in Galaxy such as workflows will often hide history datasets in order to simplify the history and hide intermediate steps of an automated analysis. These hidden datasets won’t normally appear in the history panel but they can be made visible by clicking the slashed eye icon at the top right of the History panel. If your history has hidden datasets, a number will appear next to the icon. Each hidden dataset has a link in the top of the summary view that allows you to unhide it. You can click that link again (which will now be ‘hide hidden’) to make them not shown again.
Deleting and undeleting datasets
You can delete any dataset in your history by clicking the delete button. This does not immediately remove the dataset’s data from Galaxy and it is reversible. When you delete a dataset from the history, it will be removed from the panel but (like hidden datasets) the total number of deleted datasets is shown next to the trashcan icon next to the show/hide histories icon. Clicking this button will make the deleted datasets visible and each deleted dataset will have a link for manually undeleting it above its title. You can click that link again (which will now be ‘hide deleted’) to make them not shown again.
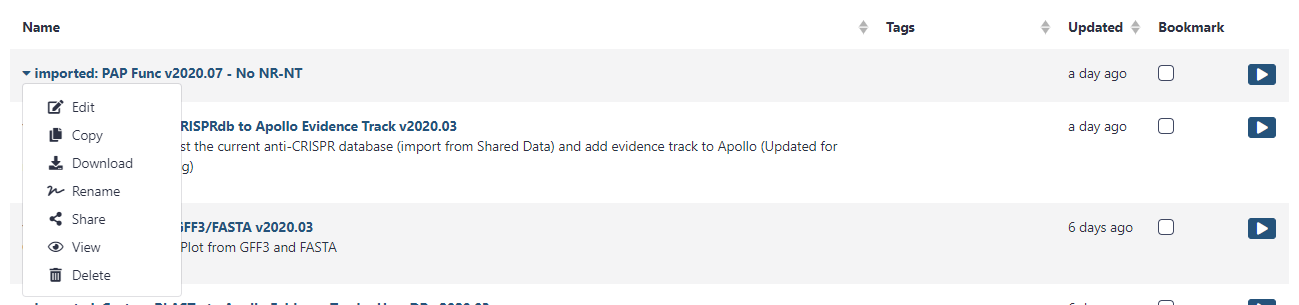
Re-naming Datasets
Click on the symbol in a dataset. This will bring up editable fields in the main Galaxy interface.
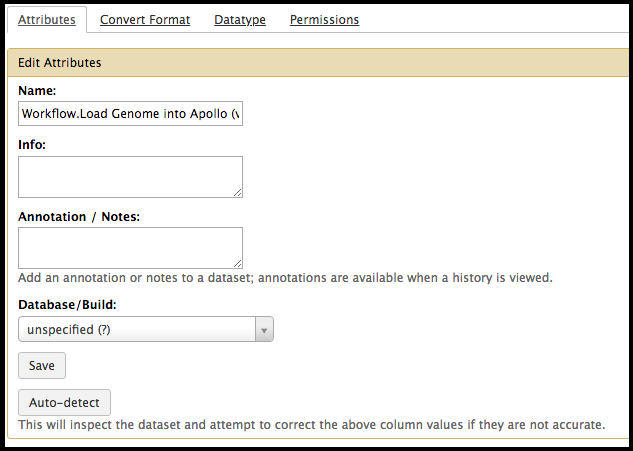
There, the name of the dataset can be changed, and this new name will appear on the dataset in the history window. It is recommended to rename key datasets and those that have ambiguous titles, such as when multiple attempts of the same tools are tried with different parameters. Additional notes may also be added here. Make sure to click Save at the bottom of the window to keep your changes.
Workflows
What is a Workflow?
Workflows are…
… a collections of jobs, where some jobs depend on the outputs of other jobs. Workflows solve numerous problems, such as:
- Running tools in series. The next step can begin as soon as data is available; a human does not have to manually start it.
- Discarding useless data. In the example below, most likely only the output BLASTp results are desired, and not the numerous intermediate files.
- Simplification of interfaces. Workflows hide the complexity of many Galaxy tools. The users are often less interested in the extraction of features from a GFF3 file, than they are in the translation of those to protein sequences.
- Repeatability. Workflows make it possible to run data in a repeatable manner that allows for consistent reproduction of results and eliminates human error due to incorrectly entering parameters.
Say a task has been presented, such as follows:
- Loading data from Apollo
- Extract all of the genes as DNA sequences
- Translate said DNA sequences to protein sequences
- Run those protein sequences through BLASTp
Doing these tasks one by one would mean keeping track of at least 4 files. The user would have to wait for one tool to finish before executing the next one. This is where workflows come in handy:

Importing a Workflow
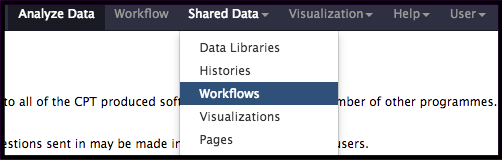
Often times, a workflow will need to be imported for it to be used. Select the Shared Data drop-down menu at the top of the galaxy interface, and Select Workflows. This will bring up a page of all of the available workflows in the Galaxy instance.
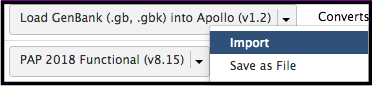
Find the workflow of interest, select the down arrow, and click Import. Each workflow has a short description of what it does on the right, as well as the owner and date of last update. It is advised to use the most recent version of the desired workflow.
The imported workflow will then become available for use under the Workflow menu at the top of Galaxy (to the right of Shared Data.)
Advanced Users…
Unable to find a specific workflow for the project/genome at hand? Read this tutorial for more information on building a new workflow.
Running a Workflow
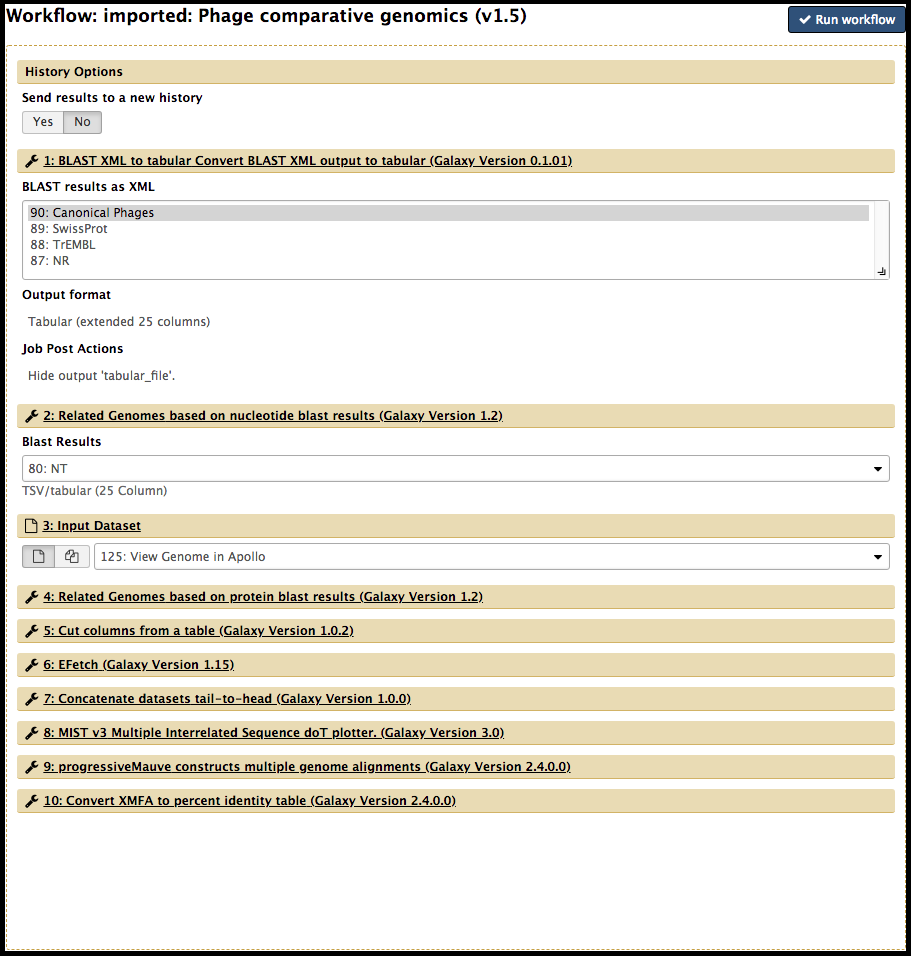
In the collection of workflows, click on the blue play button to the right of the desired workflow.
The workflow interface page will appear; this can feel a little overwhelming, especially as a beginner. For the most part, the parameters are pre-configured. Some inputs may need to be manually adjusted by the user. Ask the CPT staff and IT management (cpt@tamu.edu) if there is confusion about the necessary inputs.
Note …
Larger workflows often take several minutes to populate the screen. Do not refresh your page during this time, or else it will return you to the home screen.
When ready, click the Run workflow button at the top to launch the workflow.
Key points
Congratulations on successfully completing this tutorial!
Help us improve this content!
Please take a moment to fill in the Galaxy Training Network Feedback Form. Your feedback helps us improve this tutorial and will be considered in future revisions.