2. Functional Annotation Workflow
2.1. Prerequisites
Once your structural annotation is completely done, you’re ready to move on to the functional annotation. Reviewing your gene calls now and getting them right will save you significant amounts of time later.
2.2. Workflow
To start, you will need to fetch your data from Apollo into Galaxy, by using the Retrieve Data tool in Galaxy. Simply select your Phage’s name in the Organism box.
Select import at the top right, in green.

Fig. 2.17 NB: This is a generic image, your workflow may have a different name. You need to use the button at the right to import the workflow
Once you’ve imported it, you’ll want to start using this workflow

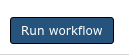
Again, using the dropdown to actually Run workflow
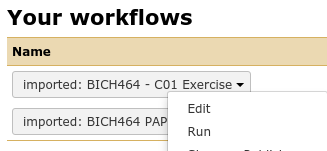
Fig. 2.18 NB: This is a generic image, your workflow may have a different name.
Execute
If everything went successfully, you’ll see a notice, you should follow the instructions

This workflow will execute a large number of analyses on your behalf:
- BLAST against numerous databases
- InterProScan
- Phage Spanin finding tools
- Various other analyses
When done, it will load your genome and the gene call evidence into Apollo. From there you will need to go through the genome and annotate it based on the evidence in the various tracks.
2.3. When It’s Done
We have some notes on annotation in Annotation
