1. Structural Annotation Workflow
1.1. Prerequisites
- Decide on a name for the phage if you do not have one chosen already one.
- Upload your fasta formatted file to the CPT’s Galaxy (CPT Public Galaxy, CPT TAMU Galaxy)
- Change the identifier of the fasta sequence in your genome to that name.
Note
If you have any questions or trouble with this, please feel free to contact us.
1.2. Workflow
This workflow will run your genome through three automated gene callers, MetaGeneAnnotator, GeneMarkS, and Glimmer3. A completely naive set of orf will also be generated, in case you believe you find a gene not in any of the evidence tracks. Lastly, tRNA and terminator finding tools will be run.
Select import at the top right, in green.

Fig. 1.25 NB: This is a generic image, your workflow may have a different name. You need to use the button at the right to import the workflow
Once you’ve imported it, you’ll want to start using this workflow

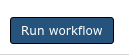
Again, using the dropdown to actually Run workflow
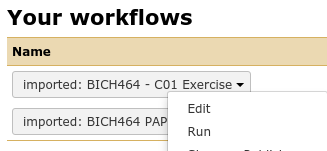
Fig. 1.26 NB: This is a generic image, your workflow may have a different name.
Specify the following:
| Step | Field | Data |
|---|---|---|
| Step 1: Input Dataset | Fasta Genome | Your phage’s Fasta Genome |
| Step 25: Create or Update Organism | Organism Common Name | Your phage’s name |
| Step 25: Create or Update Organism | Genus / Species | Genus and Species, if available. |
Execute
If everything went successfully, you’ll see a notice, you should follow the instructions

1.3. Gene Calling
This workflow has now loaded your genome and the tracks of gene call evidence into Apollo. From there you will need to go through the genome and select the likely gene calls. Remember that the three gene callers are correct maybe 90-95% of the time. Your task is to examine each likely gene region, and select the best call.
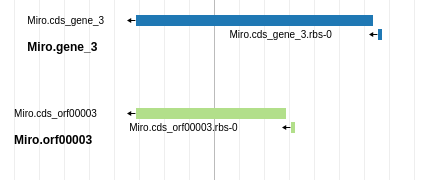
Fig. 1.27 Blue is probably a better choice than green in this case, because it has higher genomic coverage and a Shine Dalgarno site identified.
You will need to “Create » Gene” for every likely gene in your genome. It is better to over-call your genome (call more genes than are likely to be there), than to under-call genes and have to go back and re-run blast and related analyses. You will need to complete this process before you can start on the functional annotation.
Remember to remove genes that you called which lack evidence before you are done.
Important
If you have any questions on the process, please feel free to contact Eric.
1.4. When It’s Done
Once you have identified genes across the full length of your genome, you are ready to move onto the Functional Annotation Workflow
